
Sommaire
Are you more of a “no stress” or “maniaco-maniac” type? When it comes to maintaining his waterproof underwater photo housing, some have shaky hands and sweaty brows. While others pay very little attention to their gear except to cast a few incantations to avoid drowning. Everyone has their own method… However, the maintenance of a caisson is not tedious as long as you pay attention to a few points. Here are a few tips to properly clean and maintain your waterproof case and avoid a few disappointments.
-
First use of an underwater photo housing
First of all, when you have just acquired a waterproof housing, whatever the brand, it should be tested empty (without the device). Before putting in a device that can cost several hundred euros or more, it is better to be sure that its housing is perfectly waterproof. As any material, a defect is not to exclude, or a bad manipulation on behalf of the user. Why hurry when all you have to do is take it down when it’s empty. A depth of about ten meters is sufficient, no need to lower it to the maximum depth allowed for the box. But if the opportunity presents itself don’t deprive yourself !
-
Installing the unit and closing the underwater photo housing
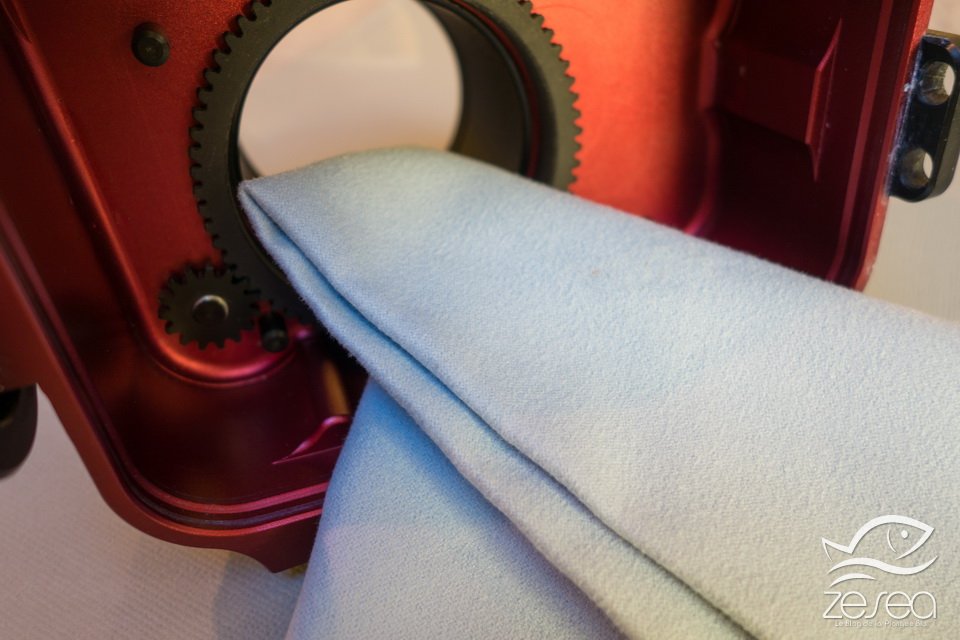 The positioning of the unit inside the waterproof housing is a crucial moment. It’s a quiet, undisturbed manipulation. Doing it in agitation or doing other things at the same time is the best way to do something stupid that you will regret later. When you open your cabinet to prepare it, start by checking the cleanliness inside. In particular the window glass must be clean. If this is not the case, use a soft microfibre cloth (which will not leave fibres inside). Dust on the inside of the window may spoil your photos.
You can then position the unit in the housing. Before closing it, carefully scan the rear door seal all around to make sure there is no dirt (dust, hair, sand,…) that could cause a possible leak. That’s really the most important thing to do every time you close! You can then lock the rear door. Personally, once the door is closed, I always turn the device on in order to check that it works on the one hand, that it is well positioned, and that the battery is well charged. For those who usually remove the memory card, remember to take a picture at this time, if you forgot the card the camera will tell you. It’s always better to learn it then, than 10m below the surface! And here’s your chamber ready to dive.
-
O-ring maintenance
This is certainly the most debated issue in the maintenance of a housing, and which is also the most anxiogenic for the user. The O-ring, or seal is obviously the sensitive point since it is it that will make your housing watertight… or not ! And as I have already seen, users are sometimes tempted to remove, clean and grease the seal(s) between each dive. Well, I’m not going to go along with it, you’d want to drown your equipment than you’d do better ! You may find this exaggerated, but the more you handle the gasket, the greater the risk of making a mistake.
When you have done it once correctly, tell yourself that you can easily do at least ten dives without making new ones. Simply, it will be enough to check well before each closing of box, that the joint is well clean, and possibly to wipe with the finger the few small dirts which can come to stick on itself.
To clean the O-ring, use a CB type card that will help you remove the O-ring without damaging it. Start by thoroughly cleaning the joint location. This is very important because once the seal has been replaced you will no longer see any dirt, so make sure the location is clean.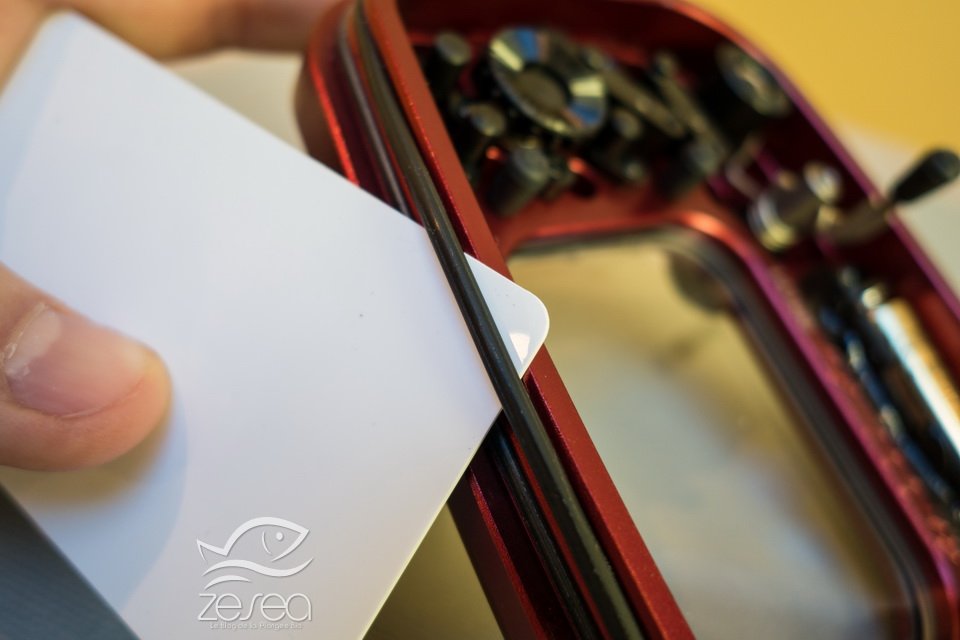
For the joint, remove your head so that it can play its role perfectly, it must be well greased ! On the contrary, too much grease will attract dirt. Start by washing the joint under water with a little soap. Then shake it vigorously to remove the water. Avoid doing this with a cloth or towel, so as not to leave fibres stuck on it. Finally, before replacing it, put a tiny quantity of grease (delivered with your housing) at the tip of your finger, and pass the seal between your fingers to lubricate it a minimum. The joint should be barely shiny. The grease must not form a “pack” on the surface of the seal. You can then place it back on the housing.
-
Maintain your underwater photo housing after each dive
Once it is known that the inside of the housing is clean, as well as the seal, the most important thing will be to maintain its watertight housing plunged after diving. And for that, nothing tiresome, since this one only needs to be rinsed well. Soaking the chamber under a jet of water is a first step if you can’t do more on the spot, but plan to soak it for a minimum of 5 to 10 minutes in fresh water as soon as possible. The ideal is to let it soak a good half an hour. Activating all the controls of the box in the rinsing tank will allow salt water trapped between the buttons to escape, and avoid salt crystallization during drying.
-
Maintain your underwater photo housing before a diving trip
When you go diving, whether it is one or two weeks, do you want to spend your time cleaning your waterproof housing? I guess not, and that’s before it’s all at stake. Before the departure, the big cleaning of the caisson is essential ! The door gasket is removed, cleaned, the inside of the housing is polished, the window glass is polished, and everything is checked to ensure that it is working properly, and that the buttons activate and do not get stuck. If not, there was certainly a rinsing fault so… rinse again !!! Do not hesitate to put the container in warm water (about 30°), the residual salt will dissolve more quickly. Then grease the cleaned gasket, as explained previously, your housing is then ready for the living room.
Overall, if you do it correctly before your departure, you won’t have to come back during your trip, unless you see that the joint is really dirty, at this account obviously, a cleaning is necessary. The most important thing will be to leave your equipment in the rinse tank sufficiently after each dive.
-
What do we do in case of hibernation?
If you do not use your underwater photo housing for several months, you can remove the gasket(s) from the back door. Put them in a bag after greasing them well. This will ensure that they are not left compressed for too long in the box, and the fat will prevent them from losing their elasticity. When you put them back, you will have to clean and grease them at least to put them back in the housing. During this period of non-use, avoid leaving your housing open, to avoid any dust entering inside.
This is what you need to make the cleaning of your waterproof housing less dramatic. If in doubt, do not hesitate to make an empty dive to reassure yourself. And if you have been using your underwater photo housing for several years, or if you have done a very large number of dives with it (no less than 200-300), you can also send it for a complete maintenance to your dealer or manufacturer, who will check and change all the seals. You’ll be good as new again !